
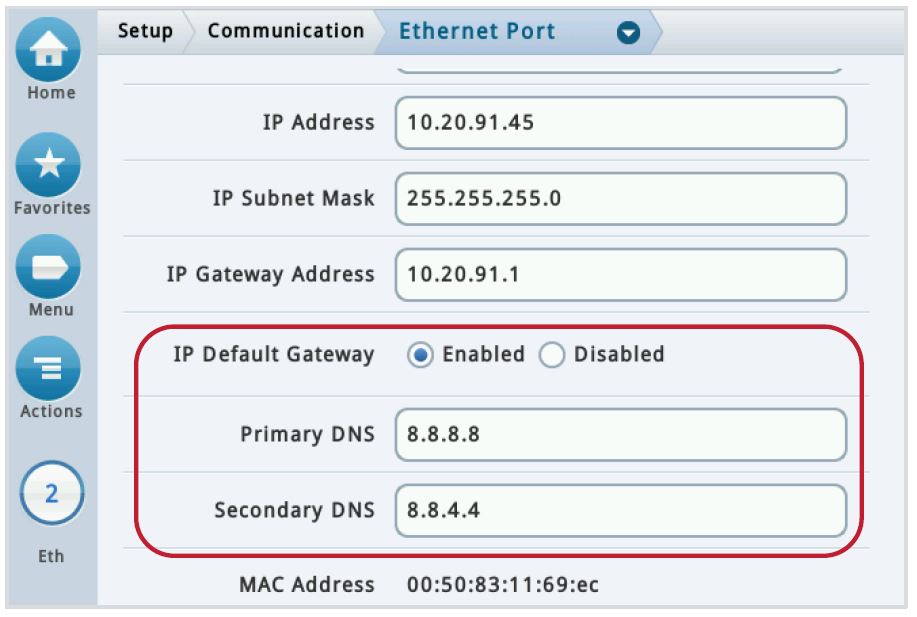
Ethernet Port
Menu > Setup > Communication > Ethernet Port
- Confirm a CAT5 cable is connected to the correct ethernet port.
- Confirm the ethernet port is working by checking the port for lights. No lights or a red light can indicate a bad port.
- For static IP addresses, confirm the IP Default Gateway is set to enabled. Only one port can use the default gateway, which allows outside network access.
- Confirm there is a Primary and Secondary DNS
Note: Google’s public DNS servers are 8.8.8.8 and 8.8.4.4.
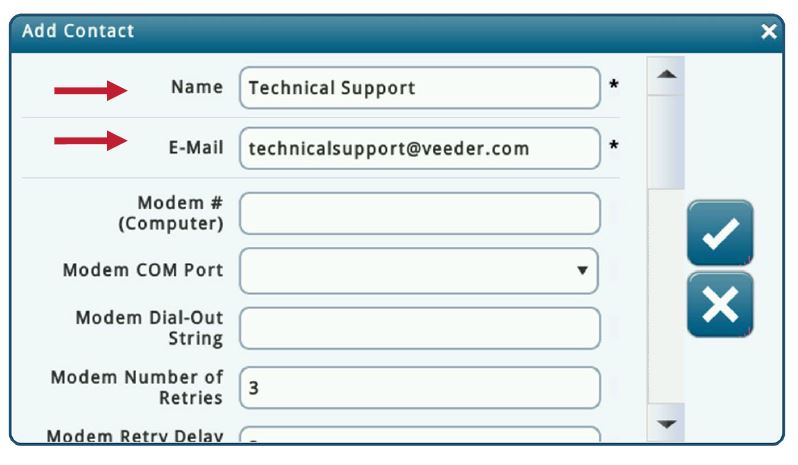
Address Book
Menu > Setup > Automatic Events > Address Book
To add a new contact, select Actions > Add Contact
- Name: Contact’s name.
- Email: Contact’s email address.
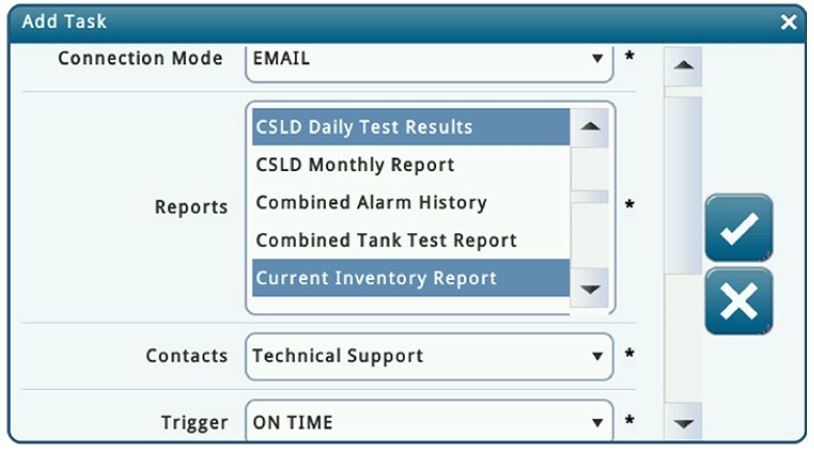
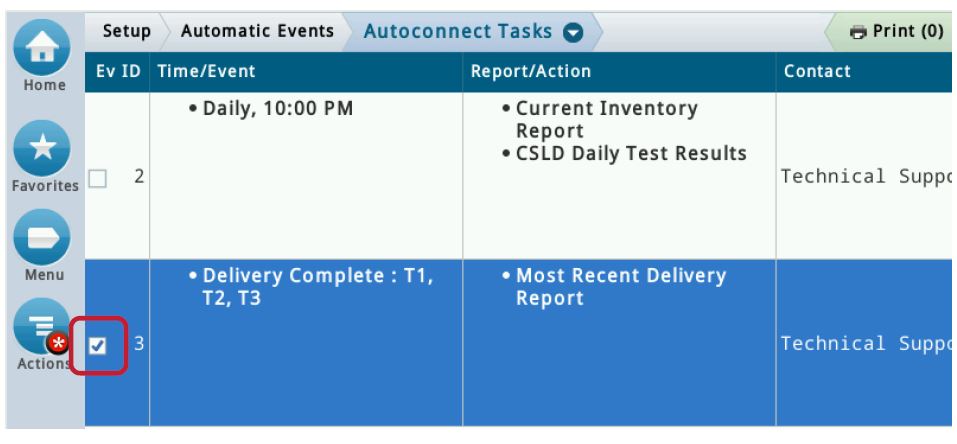
Autoconnect Tasks
Menu > Setup > Automatic Events > Autoconnect Tasks
To add a new task, select Action > Add Task
- Connection Mode: Email
- Reports: Select all reports to be emailed to the contact.
- Contacts: Select the contact’s name.
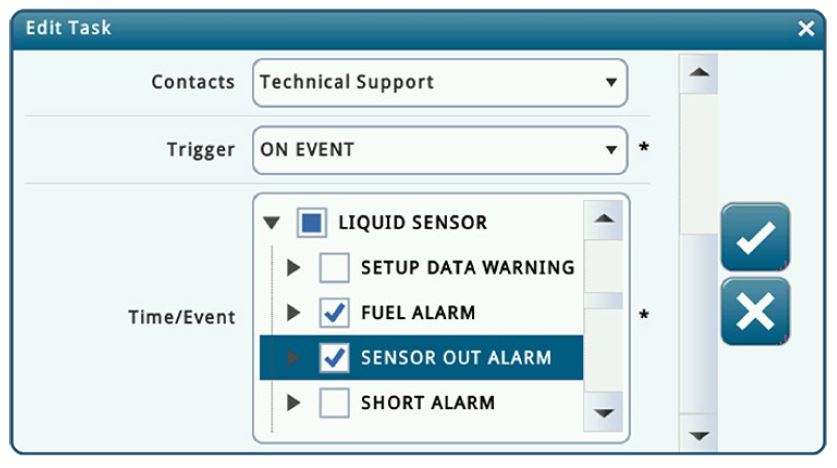
- Trigger: Select “on time” or “on event.”
On Time: Select the date and time for the email to be sent.
On Event: Select the event and/or alarm for an email to be sent.
To edit or delete a task, select the check box, then select Actions > Edit Task or Remove Task
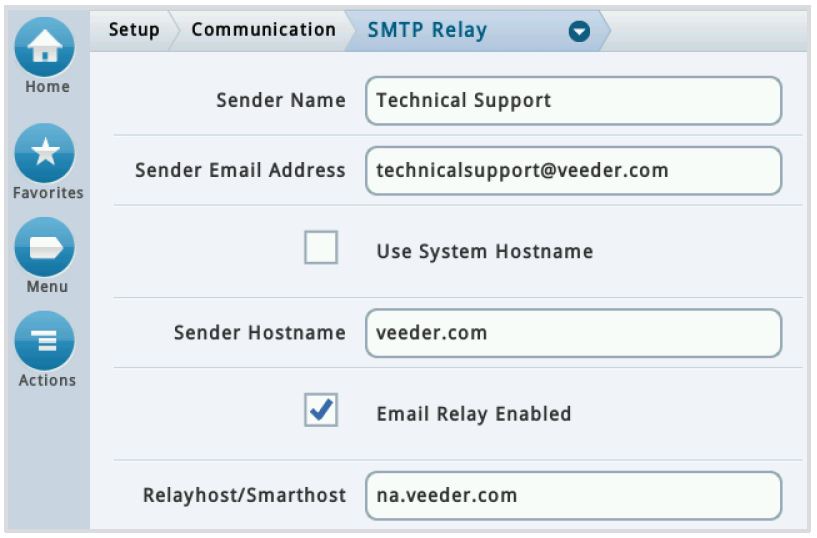
SMTP Relay
Menu > Setup > Communication > SMTP Relay
Networks may have security settings that are incompatible with console defaults. If so, a compatible SMTP server will need to be specified in order to send mail.
- Sender Name: This specifies the name that will be displayed as the sender of the email.
- Sender Email Address: This specifies the originating email address.
- Use System Hostname: If enabled, the system hostname is used and is displayed below. If disabled, you can enter a valid hostname in the field below. The default is enabled.
- Sender Hostname: The email address after the @ symbol such as “veeder.com.”
- Relayhost / Smarthost: The name of the email server: “na.companymail.com.”
SMTP Relay: Send Test Email
Located on the bottom of the SMTP Relay screen.
Note: The following steps require software version 9S or higher.
On the bottom of the page, there’s an option to Send Test Email.
- Test Email Receiver: Address of the email recipient.
- Choose Email from Contacts: Opens a selection field with a list of contacts from the Address Book.
- Send Test Email: Sends a test email to the test email receiver.


Troubleshooting Steps
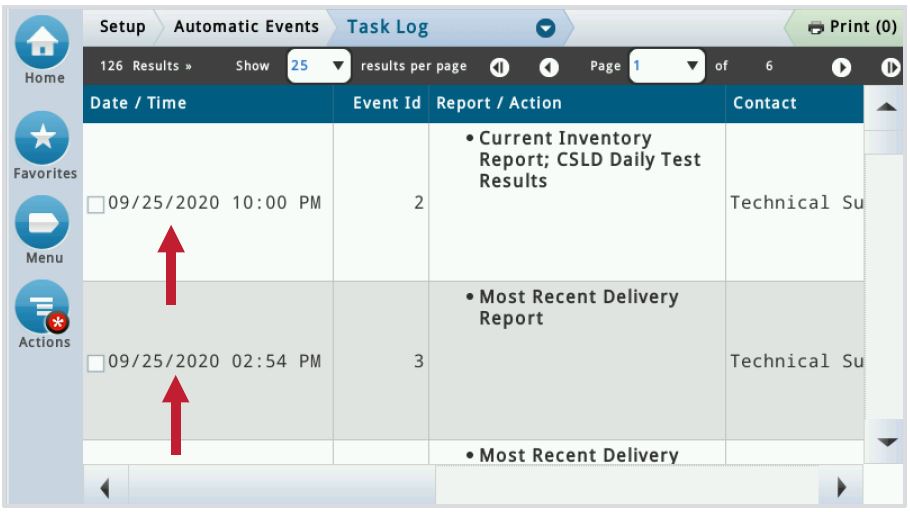
Task Log
Menu > Setup > Automatic Events > Task Log
- Confirm the console is sending out the correct autoconnect tasks. If the events are not listed, confirm console programming.
- Check spam and junk folders for the missing emails.
Testing the DNS Servers
Note: The following steps require software version 8S or higher.
Note: The following steps require a laptop to be connected to the same network as the console and access to the web portal.
Web Enabled
- Open a web browser.
- In the address bar, type inhttps://y.y.y.ywhere y.y.y.yis the console’s IP address.
- Enter the username and password.
- Press “Sign In.”
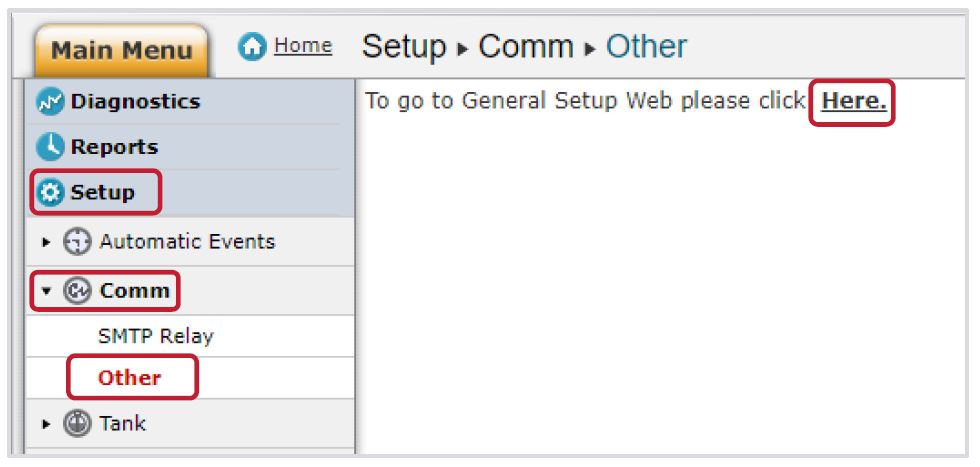
Traceroute
- Setup > Comm > Other
- Then select “Here.”
This will open a new page.
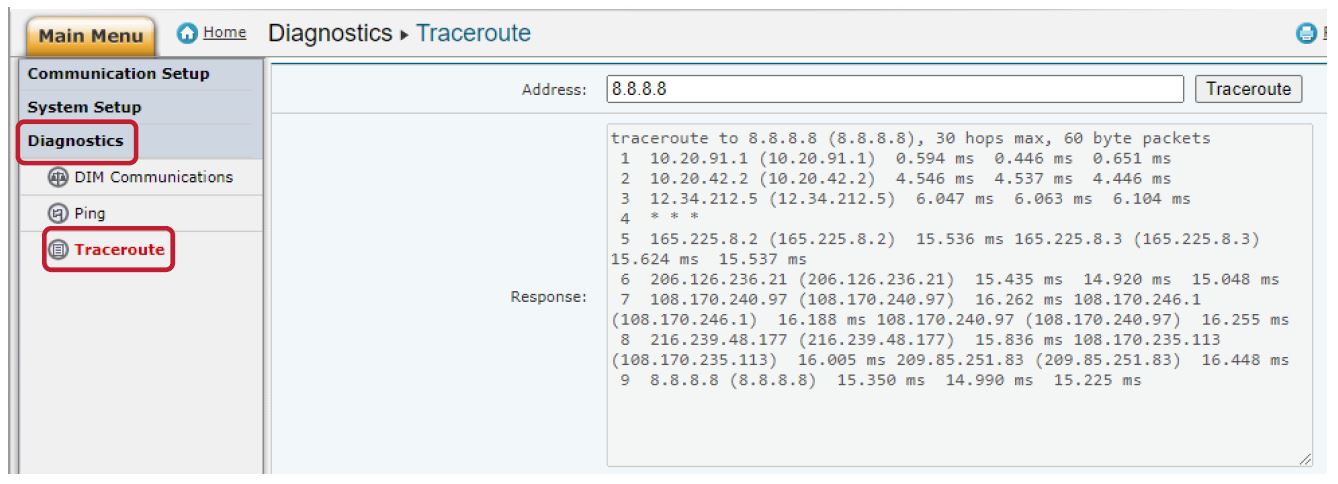
- Select Diagnostics > Traceroute
- Address: Type in the Primary DNS.
- Select the “Traceroute” button.
- Console can reach the DNS server or where it is getting blocked.
Note: If the DNS server cannot be reached, then an IT professional should be contacted for additional help navigating the site’s network.
Further Information
- Contact Veeder-Root Technical Support at 1-800-323-1799 for additional help or questions.
- Learn more the TLS4 Series Consoles on our webpage.
- Technical Support Notification - TLS4 Series Programming – Email Setup & Troubleshooting (576047-368)